
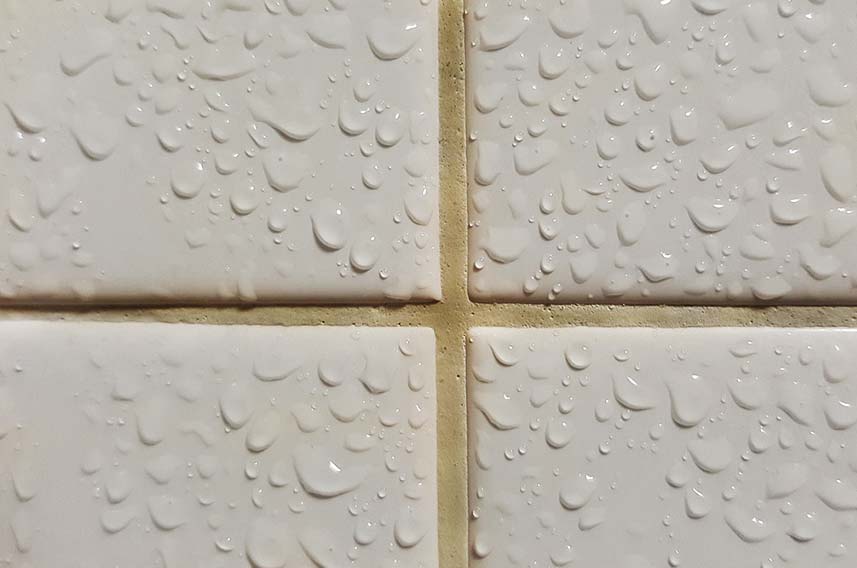
5 Ways to Whiten Grout Between Tiles
There’s something undeniably satisfying about clean, crisp tiles with perfectly white grout.
Over time, though, grout has a tendency to lose its lustre, succumbing to stains and discoloration.
But fear not, for there are ways to be able to whiten grout without completely refitting it.
In this article, we’ll uncover the secrets of how to whiten grout using simple household items and a bit of elbow grease.
From lemon juice to toothpaste, we’ve got the lowdown on five effective methods to bring your grout back to life.
Table of Contents
What is Grout?
Before diving into the cleaning methods, let’s understand grout.
Grout is typically composed of a mixture of water, cement, and sand, sometimes with added additives for specific properties like flexibility or waterproofing.
This amalgamation creates a paste-like substance that’s applied in the spaces between tiles during installation.
While it might seem like a minor detail, grout serves multiple crucial functions beyond mere aesthetics.
First and foremost, grout provides structural support to the tiles.
It acts as a stabilising agent, preventing tiles from shifting or moving once they are in place.
This is particularly vital in high-traffic areas or places where heavy objects might be placed on the tiles, ensuring they remain firmly in position.
Grout acts as a protective barrier against moisture.
In places like kitchens, bathrooms, or outdoor installations, where tiles are frequently exposed to water, grout plays a pivotal role.
It prevents water from seeping beneath the tiles, which could lead to mould growth, structural damage, and a host of other issues.
Beyond its functional roles, grout significantly impacts the visual appeal of your tiled spaces.
The colour of grout can dramatically influence the overall look.
Whether you choose a grout that matches your tiles for a seamless appearance or a contrasting colour to create a decorative pattern, grout enhances the aesthetic cohesion of your tiles.
What Turns Grout Black?
Grout, despite its initial bright appearance, often succumbs to the darker shades of filth, presenting homeowners with a challenge.
Understanding the processes that turn grout black is essential for effective cleaning strategies.
Mould and Mildew
Grout’s porous nature makes it a perfect breeding ground for mould and mildew.
In damp environments like bathrooms and kitchens, where moisture lingers, these fungi find a welcoming home.
As they grow, they create a black or dark greenish hue, tarnishing the grout lines, while also bringing a musty, damp smell.
Dirt and Soil
Over time, dirt particles and soil residue find their way into the microscopic pores of grout.
These tiny particles might not seem significant individually, but collectively, they create a grimy layer that gradually darkens the grout.
This is particularly noticeable in high-traffic areas.
Soap Scum
In the bathroom, soap scum is a notorious grout darkener.
It forms when the fats and minerals in soap combine with water and settle onto the grout lines.
Over time, this residue hardens, turning into a stubborn layer that’s challenging to remove.
Hard Water Stains
Homes with hard water face a unique challenge.
The minerals in hard water, like calcium and magnesium, can deposit on grout and tiles.
Over time, these mineral deposits form a stubborn layer that not only turns grout black but also makes cleaning more difficult.
Chemical Reactions
Sometimes, cleaning products used on adjacent surfaces can spill onto grout lines.
Certain chemicals can react with the grout material, leading to discoloration.
Wear and Tear
Grout, like any other material, undergoes wear and tear over time.
As it ages, its ability to repel stains diminishes.
This ageing process, coupled with consistent use and exposure, can darken the grout naturally.
How to Whiten Grout with Lemon Juice
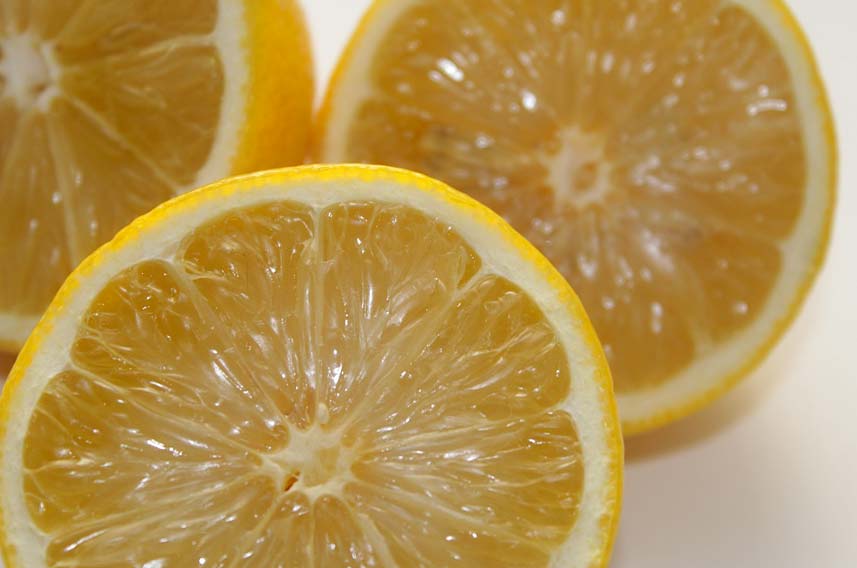
When it comes to natural cleaning, few agents match the effectiveness of lemon juice.
This citrus marvel, packed with natural bleaching properties, offers a gentle yet potent solution for grout cleaning, and also helps to whiten grout.
Prepare the Mixture
Start by mixing equal parts of freshly squeezed lemon juice and water.
This dilution ensures that the lemon juice is effective without being too harsh on the grout or the environment.
Application
Using a clean brush or a sponge, generously apply the lemon juice mixture onto the stained grout lines.
Ensure that the grout is thoroughly soaked with the solution. The citric acid in lemon juice works as a natural bleach, breaking down stains and discoloration.
Let it Sit
Allow the lemon juice mixture to sit on the grout for at least 10 to 15 minutes.
This time allows the citric acid to penetrate the stains, making them easier to scrub away.
Scrubbing
After leaving, use an old toothbrush or a grout brush to scrub the grout lines vigorously.
The brushing action, combined with the lemon juice, lifts away the stains.
For stubborn spots, apply a little extra pressure while scrubbing.
Rinse Thoroughly
Once you’ve scrubbed the grout lines, rinse the area thoroughly with clean water.
This step is crucial to remove any remaining lemon juice residue, ensuring your grout doesn’t attract more dirt due to stickiness.
Pros
Natural and Environmentally Friendly
Lemon juice is entirely natural, making it safe for both your health and the environment.
You don’t have to worry about harsh chemicals lingering in your living space.
Gentle on Grout
Unlike some commercial cleaners, lemon juice is gentle on grout.
It is effectively without eroding the grout’s surface, ensuring your grout remains intact.
Pleasant Scent
One of the added benefits of using lemon juice is the refreshing citrus scent it leaves behind. Your cleaned grout will not only look good but also smell fresh.
Cons
Time-Consuming
While lemon juice is effective, it may take multiple applications and a fair amount of scrubbing to remove stubborn stains completely.
This method can be time-consuming, especially for extensive grouted areas.
Not Suitable for All Stains
Lemon juice works well on many stains, but it might not be potent enough for deeply entrenched or very old discolorations.
In such cases, commercial cleaners might be necessary.
How to Whiten Grout with Vinegar & Bicarbonate of Soda
When it comes to battling stubborn grout stains, the combination of vinegar and baking soda emerges as a formidable and natural solution.
This dynamic duo’s chemical reaction provides an eco-friendly yet potent way to whiten grout effectively.
Prepare the Paste
Start by mixing baking soda with water to create a thick paste.
The paste should be spreadable but not too runny, ensuring it adheres well to the grout lines.
Application
Using a spatula or an old toothbrush, apply the baking soda paste generously onto the stained grout.
Ensure the grout lines are entirely covered with the paste.
Add Vinegar
Once the baking soda paste is applied, spray the grout lines with vinegar.
As vinegar reacts with baking soda, it fizzes and creates a gentle, natural lifting effect, loosening the grime and stains from the grout surface.
Let it Fizz
Let the fizzy reaction do its magic.
Allow the paste and vinegar mixture to sit for about 10-15 minutes.
During this time, the chemical reaction breaks down the stains, making them easier to remove.
Gentle Scrubbing
After the waiting period, take an old toothbrush or a grout brush and gently scrub the grout lines.
The combination of the paste and the fizzy reaction softens the stains, making them easier to lift away.
Rinse Thoroughly
Once you’ve scrubbed the grout lines, rinse the area thoroughly with clean water to remove any residue. This step is crucial to prevent any stickiness or residue buildup.
Pros
Eco-Friendly and Safe
Vinegar and baking soda are natural cleaning agents, making them safe for both your health and the environment.
You won’t be introducing harsh chemicals into your home.
Effective Stain Removal
The chemical reaction between vinegar and baking soda provides an excellent cleaning effect.
It can tackle a wide range of stains, including dirt, mould, and mildew, and whiten grout.
Budget-Friendly
Both vinegar and baking soda are incredibly inexpensive and readily available in most households.
Using these common items for cleaning purposes can save you money on specialised cleaning products.
Cons
Fizzy Reaction Might Be Messy
The fizz created by the vinegar and baking soda reaction can be a bit messy.
It’s advisable to lay down some towels or paper towels around the area you’re cleaning to catch any drips or splatters.
Not Suitable for All Grout Types
While effective for most grout types, this method might not be suitable for delicate or very porous grouts, as the abrasive action of baking soda might cause damage.
How to Whiten Grout with a Steamer
When it comes to simplicity and efficiency in grout cleaning, a steamer stands out as a game-changer.
The high-temperature steam not only sanitises but also effortlessly dissolves stubborn dirt and stains, making it a popular choice for those seeking an easy and chemical-free solution to grout whitening.
Prepare the Steamer
Fill the steamer with water according to the manufacturer’s instructions.
Allow it a few minutes to heat up, ensuring the steam generated is at the optimum temperature for effective cleaning.
Steam Application
Hold the steam nozzle close to the grout lines.
The high-pressure steam, when directed over the grout, works by loosening and dissolving the dirt and stains.
Move the nozzle along the grout lines methodically, ensuring each section receives thorough treatment.
Gentle Scrubbing
For more stubborn stains, you can pair steam cleaning with a gentle scrubbing using an old toothbrush or a specialised grout brush.
The steam softens the stains, making them easier to lift away with the brush.
However, be cautious with abrasive scrubbing to prevent damage, especially to delicate grout types.
Wipe Clean
As you steam and scrub, have a clean cloth or microfiber towel on hand.
Wipe away the dissolved grime promptly to prevent it from resettling into the grout lines.
Pros
Effortless Cleaning
Steam cleaning requires minimal physical effort.
The high-pressure steam does most of the work, making it an excellent option for individuals with mobility issues or those who prefer a less labour-intensive cleaning method.
Chemical-Free
Steam cleaning relies solely on water, making it an eco-friendly and safe method.
It’s ideal for households where minimising chemical exposure is a priority, especially in homes with children or pets.
Sanitizes Surfaces
Besides whitening grout, steam cleaning also sanitises surfaces, killing bacteria, germs, and mould spores.
It provides a deep clean, ensuring not just visual cleanliness but also hygiene.
Cons
Initial Investment
Steam cleaners, while highly effective, require an initial investment.
Quality steamers can be relatively expensive compared to other cleaning tools.
However, their versatility often makes them a worthwhile investment for various cleaning tasks.
Not Suitable for All Grout Types
Delicate or very porous grouts might not withstand the high-pressure steam.
It’s crucial to read the manufacturer’s guidelines for both the steamer and the grout to prevent any potential damage.
How to Whiten Grout with Toothpaste

When talking about grout cleaners, toothpaste emerges as an unlikely hero.
Its mild abrasiveness, combined with gentle cleaning agents, makes it surprisingly effective in tackling grout stains.
This method is not only budget-friendly but also readily available, offering a convenient solution for localised grout cleaning needs.
Selecting the Right Toothpaste
Opt for a non-gel, whitening toothpaste.
Avoid those with added colours or gels, as they might contain ingredients that could potentially stain or damage grout.
The mild abrasives in white toothpaste work wonders without being overly harsh.
Application
Squeeze a small amount of toothpaste directly onto the stained grout lines.
A soft-bristled toothbrush is the perfect tool for this job.
Use gentle circular motions to scrub the toothpaste into the grout.
The mild abrasiveness of the toothpaste helps dislodge dirt and stains effectively.
Scrubbing
Scrub the grout lines with the toothbrush, paying extra attention to stained areas.
Depending on the severity of the stains, you might need to exert a bit of pressure, but avoid being too aggressive to prevent damage.
Rinsing Thoroughly
Once you’ve scrubbed the grout thoroughly, rinse the area with clean water.
A damp cloth or sponge can be used to wipe away the toothpaste residue.
Repeat the process if necessary, especially for persistent stains.
Pros
Readily Available
Toothpaste is a common household item, making it a convenient and accessible grout cleaning solution.
It’s a go-to option for quick spot treatments without needing to purchase specialised cleaning products.
Mild Abrasiveness
The mild abrasives in toothpaste effectively remove grime and stains without being overly harsh on grout. It’s a gentle yet surprisingly powerful method, making it suitable for various grout types.
Budget-Friendly: As a cost-effective solution, using toothpaste for grout cleaning saves money, especially for small-scale cleaning projects. It’s an economical choice for those seeking efficient cleaning without breaking the bank.
Cons
Not Suitable for Severe Stains
While effective for mild to moderate stains, toothpaste might not be potent enough for deeply embedded or stubborn grout stains.
For severe discoloration, other specialised cleaning methods might be more effective.
Requires Manual Scrubbing
Unlike some chemical cleaners or steamers, toothpaste requires manual scrubbing.
While this provides control over the cleaning process, it also means investing physical effort, which might not be suitable for large or extensive grout areas.
How to Whiten Grout with Bleach
Bleach, a stalwart in the realm of household cleaning, stands as a potent grout cleaner, albeit one that demands careful handling.
Its powerful disinfectant properties, combined with its ability to tackle stubborn stains, make it an effective solution for whitening grout.
However, this method requires caution and adherence to safety guidelines due to bleach’s strong chemical nature.
Dilution
Always dilute bleach before using it on grout.
A safe and effective ratio is one part bleach to five parts water.
This balanced mixture ensures that the bleach is potent enough to remove stains without being overly harsh on grout.
Preparation
Before starting the cleaning process, wear rubber gloves to protect your hands from direct contact with bleach.
Additionally, ensure proper ventilation in the area.
Open windows and doors to allow fresh air to circulate, preventing the inhalation of fumes.
Application
Using a spray bottle or a sponge, apply the diluted bleach solution directly onto the grout lines.
Let it sit for a brief period, usually about 10-15 minutes. This allows the bleach to penetrate and loosen the stains.
Scrubbing
Armed with a grout brush or an old toothbrush, scrub the grout lines vigorously.
The bristles help dislodge the dirt and stains that the bleach has loosened.
Be thorough but gentle to avoid damaging the grout.
Rinsing Thoroughly
Once the grout has been scrubbed, rinse the area thoroughly with clean water.
This step is crucial to remove any residual bleach from the grout.
Repeat the rinsing process multiple times to ensure all traces of bleach are eliminated.
Pros
Effective Stain Removal
Bleach is highly effective in removing stubborn stains and grime from grout.
Its potent chemical properties break down and lift even the toughest discolorations, restoring the grout’s original colour.
Disinfectant
Bleach not only cleans but also disinfects grout.
It kills bacteria, mould, and mildew, providing a hygienic environment, especially in areas like bathrooms and kitchens where grout is commonly found.
Cons
Harsh Chemical Nature
Bleach is a strong chemical that can damage grout if used excessively or in high concentrations.
Prolonged exposure can weaken the grout, making it brittle and prone to cracking or crumbling.
Potential Health Hazards
Inhalation or skin contact with bleach fumes can cause irritation.
It’s imperative to wear gloves and ensure proper ventilation to minimise health risks.
Colour Fading
Bleach can cause the colour of grout to fade, especially if it’s used frequently.
This is a concern, especially for coloured or dyed grout, as the fading can lead to an uneven appearance.
How to Keep Grout White
Once you’ve invested time and effort into being able to whiten grout, the next step is to maintain its pristine appearance.
Prevention and consistent care are your allies in this endeavour, ensuring that your grout remains white and attractive for the long haul.
Here’s a detailed guide on how to keep your grout white:
Regular Cleaning
Establish a routine for cleaning your tiles and grout.
Regularly wiping down surfaces with a mild, pH-neutral cleaner helps prevent the accumulation of dirt, soap scum, and mildew.
For an eco-friendly solution, a mixture of warm water and a few drops of dish soap can work wonders without harming your grout.
Avoid Harsh Cleaners
While grout might need occasional deep cleaning, avoid using harsh or acidic cleaners regularly.
These can erode grout over time, making it susceptible to staining and weakening its structure.
Grout Sealing
Consider sealing your grout after it’s been cleaned and whitened.
Grout sealers create a protective barrier, repelling moisture, dirt, and stains.
There are two types of grout sealers: penetrating sealers, which are absorbed into the grout, and topical sealers, which form a protective layer on the surface.
Penetrating sealers are generally preferred as they offer more long-term protection without altering the grout’s appearance.
Sealers need to be reapplied periodically, so check the manufacturer’s recommendations for the specific product you’re using.
Preventing Moisture
Moisture is one of the main culprits behind grout stains and mildew growth.
Use exhaust fans in bathrooms and kitchens to reduce humidity levels.
Dry shower walls and bathroom tiles after use to prevent water from seeping into the grout.
Avoiding Heavy Impact
Grout can crack and break under heavy pressure.
Be mindful of dropping heavy objects onto tiled surfaces, especially in areas with grout lines.
Using coasters and protective pads can help prevent accidental damage.
Regular Inspections
Periodically inspect your grout for signs of wear, cracks, or stains.
Early detection allows for prompt cleaning and maintenance, preventing minor issues from escalating into larger problems.
Gentle Scrubbing
If you notice surface stains, opt for gentle cleaning methods first.
A soft-bristled brush or an old toothbrush combined with mild cleaners can often remove minor stains without the need for harsh chemicals.
Conclusion
With these simple yet effective methods, you can bid farewell to dingy grout and welcome back the crisp, clean look to your tiles.
Remember, regular maintenance and a bit of natural cleaning magic can go a long way in preserving the beauty of your tiled spaces.
So, roll up your sleeves, grab your cleaning supplies, and get ready to whiten grout.